Your Cart is Empty


Is this your first time installing a rack on your Tacoma?
We've all been there, unsure of where to start.
The truth is...
Installing a rack on your Tacoma is an easy feat. Well, that is with the right help.
With the right rack, you don't have to spend all afternoon trying to install it on your Tacoma. That's why we recommend Prinsu.
Prinsu is a top-leading brand in the industry and one of the brands we are most proud to supply.
If you're ready to install your Prinsu rack to your Tacoma and need a little nudge in the right direction, we've got you covered.
In this article, we walk you through step by step on how to install a Prinsu rack on your vehicle, as well as some tips and tricks to help you along the way.

You've got this.
Have you ever tried working on a project without initially grabbing the right pieces of equipment and tools and cleaning up your workspace?
You probably had a hard time staying on task, and it took you more time to complete it than it should.
When it comes to installing your Prinsu rack...
Organization is key.
So, how do you get organized? Well, you make sure that your workspace is clean and clear. You're going to be working with small screws and hardware, and it's important to keep track of them throughout the entire process. Messy workspaces make it easy to lose these sorts of things.
Your Prinsu Rack should come with all the assembly hardware needed, but if you notice you need anything else to make the job easier, grab it beforehand.
Organize all of your parts and pieces so that it's easy for you to grab them as you progress through the steps of the installation. The hardware for the rack consists of:

You probably will be surprised not to find a printout of instructions in your package. We got you covered.
This goes without saying--but when it comes to installing your Prinsu rack, reading the instructions (or watching the video) is essential. Read through the instructions fully before you start the job. That way, you can prepare for any steps you may not be familiar with or grab any tools that may make this job easier. Once you've read through the instructions and have an idea of what the task entails, you're ready to start the installation.
Prinsu Tacoma Installation Guide (2005-2023)
There are four main steps outlined in detail below. As an initial matter, we recommend using something like a furniture pad and setting all parts out on the ground. Set each side plate on the side with the crossbars between the two side plates.
The first step is to build out the structure of the Prinsu rack Tacoma. Using Part A (1/4" - 20 x 1" machine screw) and Part C (1/4" flat washer), feed the screw and washer through the side plates into each of the two pre-drilled holes found on each end of the cross bars. Repeat this for each side of the rack. It is advised to not fully tighten everything at this stage.

The Prinsu rack features a total of six moveable crossbars. The custom designed crossbar has built in drop points integrated with the upward facing t slot channel.
Locate the bare aluminum cross bar and aluminum plate wind deflector. Insert all 10 Part E (1/4" - 20, 10 Series T-Nut) into the t-channels on the cross bar. These will lineup with the holes on the wind deflector so ideally space them appropriately.
Feed Part D (1/4" - 20 x 1/2" Pan Head Screws) with Part B (1/4" Lock Washers) and Part C 1/4" Flat Washers) through the pre-drilled holes on the top side of the wind deflector. Screw these into Part E (1/4" - 20, 10 Series T-Nut).

Once the wind deflector is properly assembled you can now attach the provided noise reducing edge trim.
The Prinsu noise reducing edge trim attaches to the bottom of the wind deflector and is designed to minimize wind noise. Trim off any excess from the sides.
If you elect to get a deflector with a light bar cutout, the cutout will be oriented upward once installed.
You can now attach the configured wind deflector to the rack.
Locate and remove the rubber weather trim found on the roof of your Tacoma (each side running from front to back). Remove or trim around the rubber stickers to expose the factory mounting holes.
Part F (3/4" x .319" x 1" Spacer) will sit over these mounting holes and the weather trim will need to be re-installed. In order to properly do this, you have two options:
Note that there is a steel rib in the weather stripping so you will need to cut that out for items 1 or 2 above. We recommend an angle grinder or heavy duty cutters that can handle a small strip of metal.
Re-install the weather stripping ensuring you have seamless access to the factory mounting points on the roof.
Now that the rack is assembled on the ground and the roof of the Tacoma is prepped, you are ready to mount the Tacoma Cab Rack.
But prior to lifting the rack onto the Tacoma, let's get the hardware ready.
Part F (3/4" x .319" x 1" Spacer) is designed to sit between the feet on the rack and the OEM mounting holes that were previously exposed in a prior step. Part G (M6 - 1.0 x 55MM Hex Cap Screw), Part H (1/4" Lock Washers) and Part I (1/4" x 1" Fender Washers) are all designed to sit on top of the mounting foot with Part G (M6 - 1.0 x 55MM Hex Cap Screw) going through the mounting foot and spacer into the pre-threaded hole.

Once the hardware is ready, apply silicone over each of the OEM mounting holes and then place the spacers (Part F) over the holes and silicone. Make sure you put an adequate amount of silicone to cover the hole completely.
Once you have silicone covering the holes and the spacers aligned with the holes, go grab a friend or someone who can help you lift this Prinsu roof rack onto the Tacoma. It's not that it is heavy, but it is awkward and we would hate to see a gash out of your Tacoma.
Now, lift the rack onto the Tacoma making sure to align the holes in the rack's feet with the spacers. Slowly drop the rack down making sure it aligns properly.
Once everything is aligned properly and you are happy with how the rack is sitting on the Tacoma, it is now time to secure the rack. Assemble Part G (M6 - 1.0 x 55MM Hex Cap Screw), Part H (1/4" Lock Washers) and Part I (1/4" x 1" Fender Washers). Feed the items through the top of the mounting foot through the spacer (Part F) and into the threaded hole. Screw Part G (M6 - 1.0 x 55MM Hex Cap Screw) into the threaded hole. Complete this step for the remaining attachment points.
After ensuring everything is properly tightened you are ready to hit the road with your new Prinsu rack!
With a new rack installed you might be wondering, how much weight can my Prinsu rack hold? Prinsu roof racks have an impressive static load capacity and dynamic load limit. Your new Tacoma roof rack can support 600-800 pounds static and 300-400 pounds dynamic.
The Prinsu rack looks awesome on a Tacoma, but one of the more impressive features about the Prinsu brand is the line-up of Prinsu Roof Rack Accessories that are offered and designed to work with their Tacoma rack.
Wondering how you can make your Prinsu rack stand out from the rest? Consider Prinsu shield plates or a wind deflector decal.
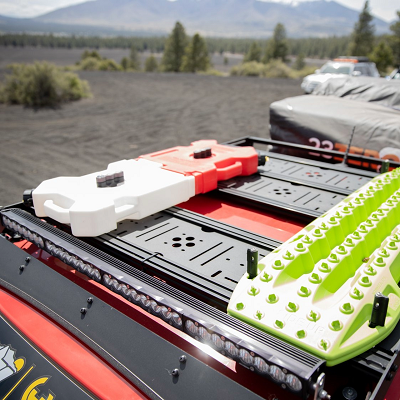
Whether you're looking for tool mounts, handles, MAXTRAX mounts, bottle opener attachments, or other mounting accessories, you can find all of Prinsu's next-level truck and SUV roof rack-mounted products at Truck Brigade.
Comments will be approved before showing up.